Ghost 1.0 版本更新

有一段時間沒寫新的Note,Ghost已經來到1.0版本。今次更新時發現了有新的安裝方式 - Ghost CLI,喜歡嘗新的我馬上就來試試Ghost 1.0有什麼新功能。
Ghost CLI
現在官方推薦使用Ghost CLI作為安裝方式,使用 npm 安裝即可。舊版本用戶也建議使用Ghost CLI安裝全新的Ghost。
$ npm install g ghost-cli@latest
然後可以開一個新資料夾,簡單使用 ghost install
$ mkdir /root/ghost
$ cd /root/ghost
$ ghost install
然後會問你一些問題來設定你的Ghost
? Enter your blog URL:
? Enter your MySQL hostname:
? Enter your MySQL username:
? Enter your MySQL password:
? Enter your Ghost database name:
✔ Configuring Ghost
✔ Setting up instance
✔ Setting up "ghost" system user
再來就是問你要不要自動設定Nginx,SSL,MySQL
基本上都說Yes就自動搞定
? Do you wish to set up Nginx?
? Do you wish to set up "ghost" mysql user?
? Do you wish to set up Systemd?
? Do you want to start Ghost?
- Blog URL填係的網址就好了 e.g. GHOST_URL/
- 大家有注意到的就是Ghost的Database預設由SQLite3改成MySQL了吧
- MySQL hostname基本上都是本機填localhost就可以
- MySQL username用你的MySQL root
- MySQL root的password
- Ghost database name不填也可,按Enter會自動填寫
- 按下來自動設定也是Enter Yes就可以
- Ghost會自動生成MySQL user及Database
完成後可以正式啟動Ghost
$ ghost start
貌似成功了
$ ✔ Validating config
$ Running sudo command: systemctl start ghost_localhost
$ ✔ Starting Ghost
$ You can access your blog at http://localhost:2368/
但是到網址見不到結果
使用 ghost ls 檢視Ghost
$ ┌───────────┬─────────────┬────────────┬─────────┬─────┬──────┬─────────────────┐
$ │ Name         │ Location     │ Version    │ Status  │ URL │ Port │ Process Manager │
$ ├───────────┼─────────────┼────────────┼─────────┼─────┼──────┼─────────────────┤
$ │ localhost    │ /root/ghost    │ 1.0.0-rc.1 │ stopped │ n/a │ n/a  │ n/a             │
$ └───────────┴─────────────┴────────────┴─────────┴─────┴──────┴─────────────────┘
沒有在運作嘛?是什麼問題呢?
我親自到Ghost-CLI的GitHub發問了
原來使用Ghost-CLI是不能在Root運行的!
官方開發人員在Ghost CLI文件中後補了以下提示
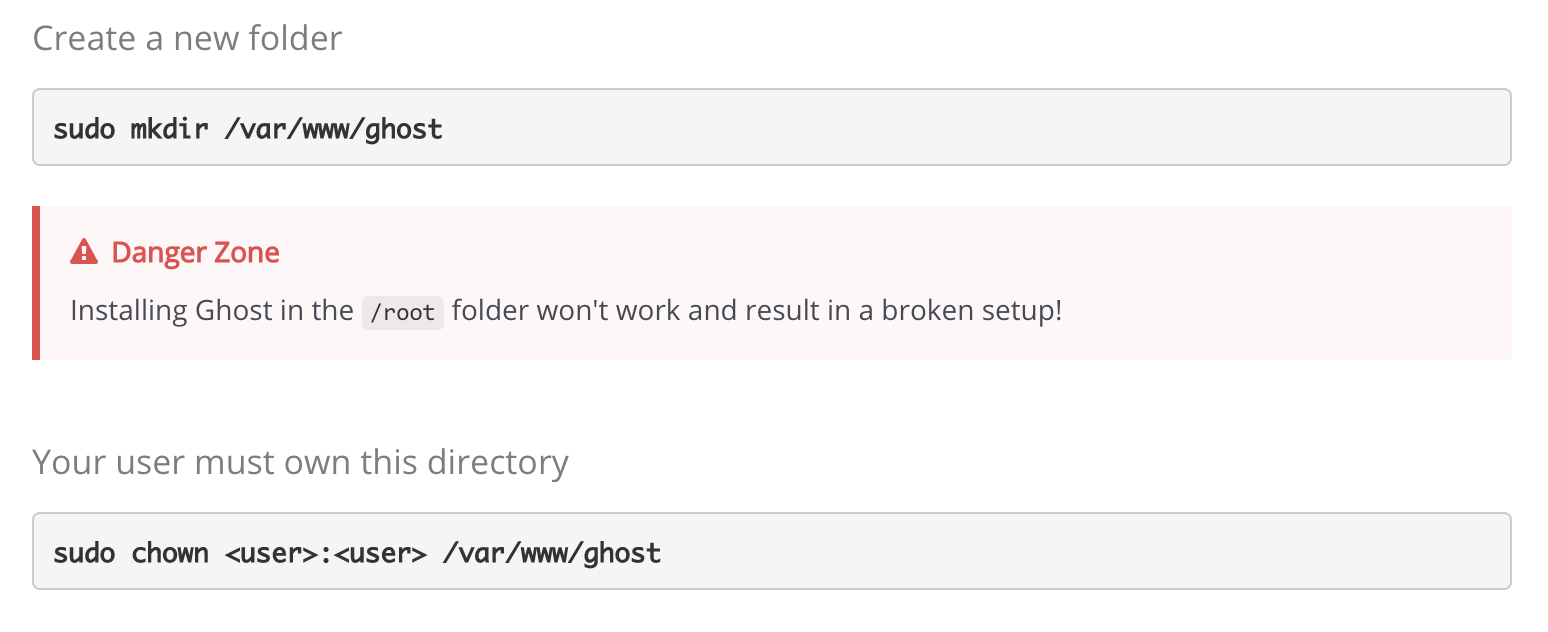
還是乖乖放到 /var/www/ghost 內 (記得用 ghost uninstall 指令解除之前安裝)
$ mkdir /var/www/ghost
$ cd /var/www/ghost
$ ghost install
然後完成設定後再次啟動Ghost
之後Nginx的設定,第一次使用的設定可以參考我第一篇文章
Process Manager
現在不用再使用PM2作管理程式,不論你安裝在何處,只要使用 ghost install 來安裝也會記錄
在任何位置只要使用 ghost ls即可查看所有Ghost的狀態。
┌───────────┬────────────────┬────────────┬──────────────────────┬────────────────────────────┬──────┬─────────────────┐
│ Name      │ Location       │ Version    │ Status               │ URL                        │ Port │ Process Manager │
├───────────┼────────────────┼────────────┼──────────────────────┼────────────────────────────┼──────┼─────────────────┤
│ localhost │ /var/app/d2lab │ 1.0.0-rc.1 │ running (production) │ https://blog.256pages.com/ │ 2368 │ systemd         │
└───────────┴────────────────┴────────────┴──────────────────────┴────────────────────────────┴──────┴─────────────────┘
由舊版本升級到1.0
舊版本基本上不能直接升級,主要因為Ghost-CLI不支援。
要升級首先要到Labs頁面中Export Content
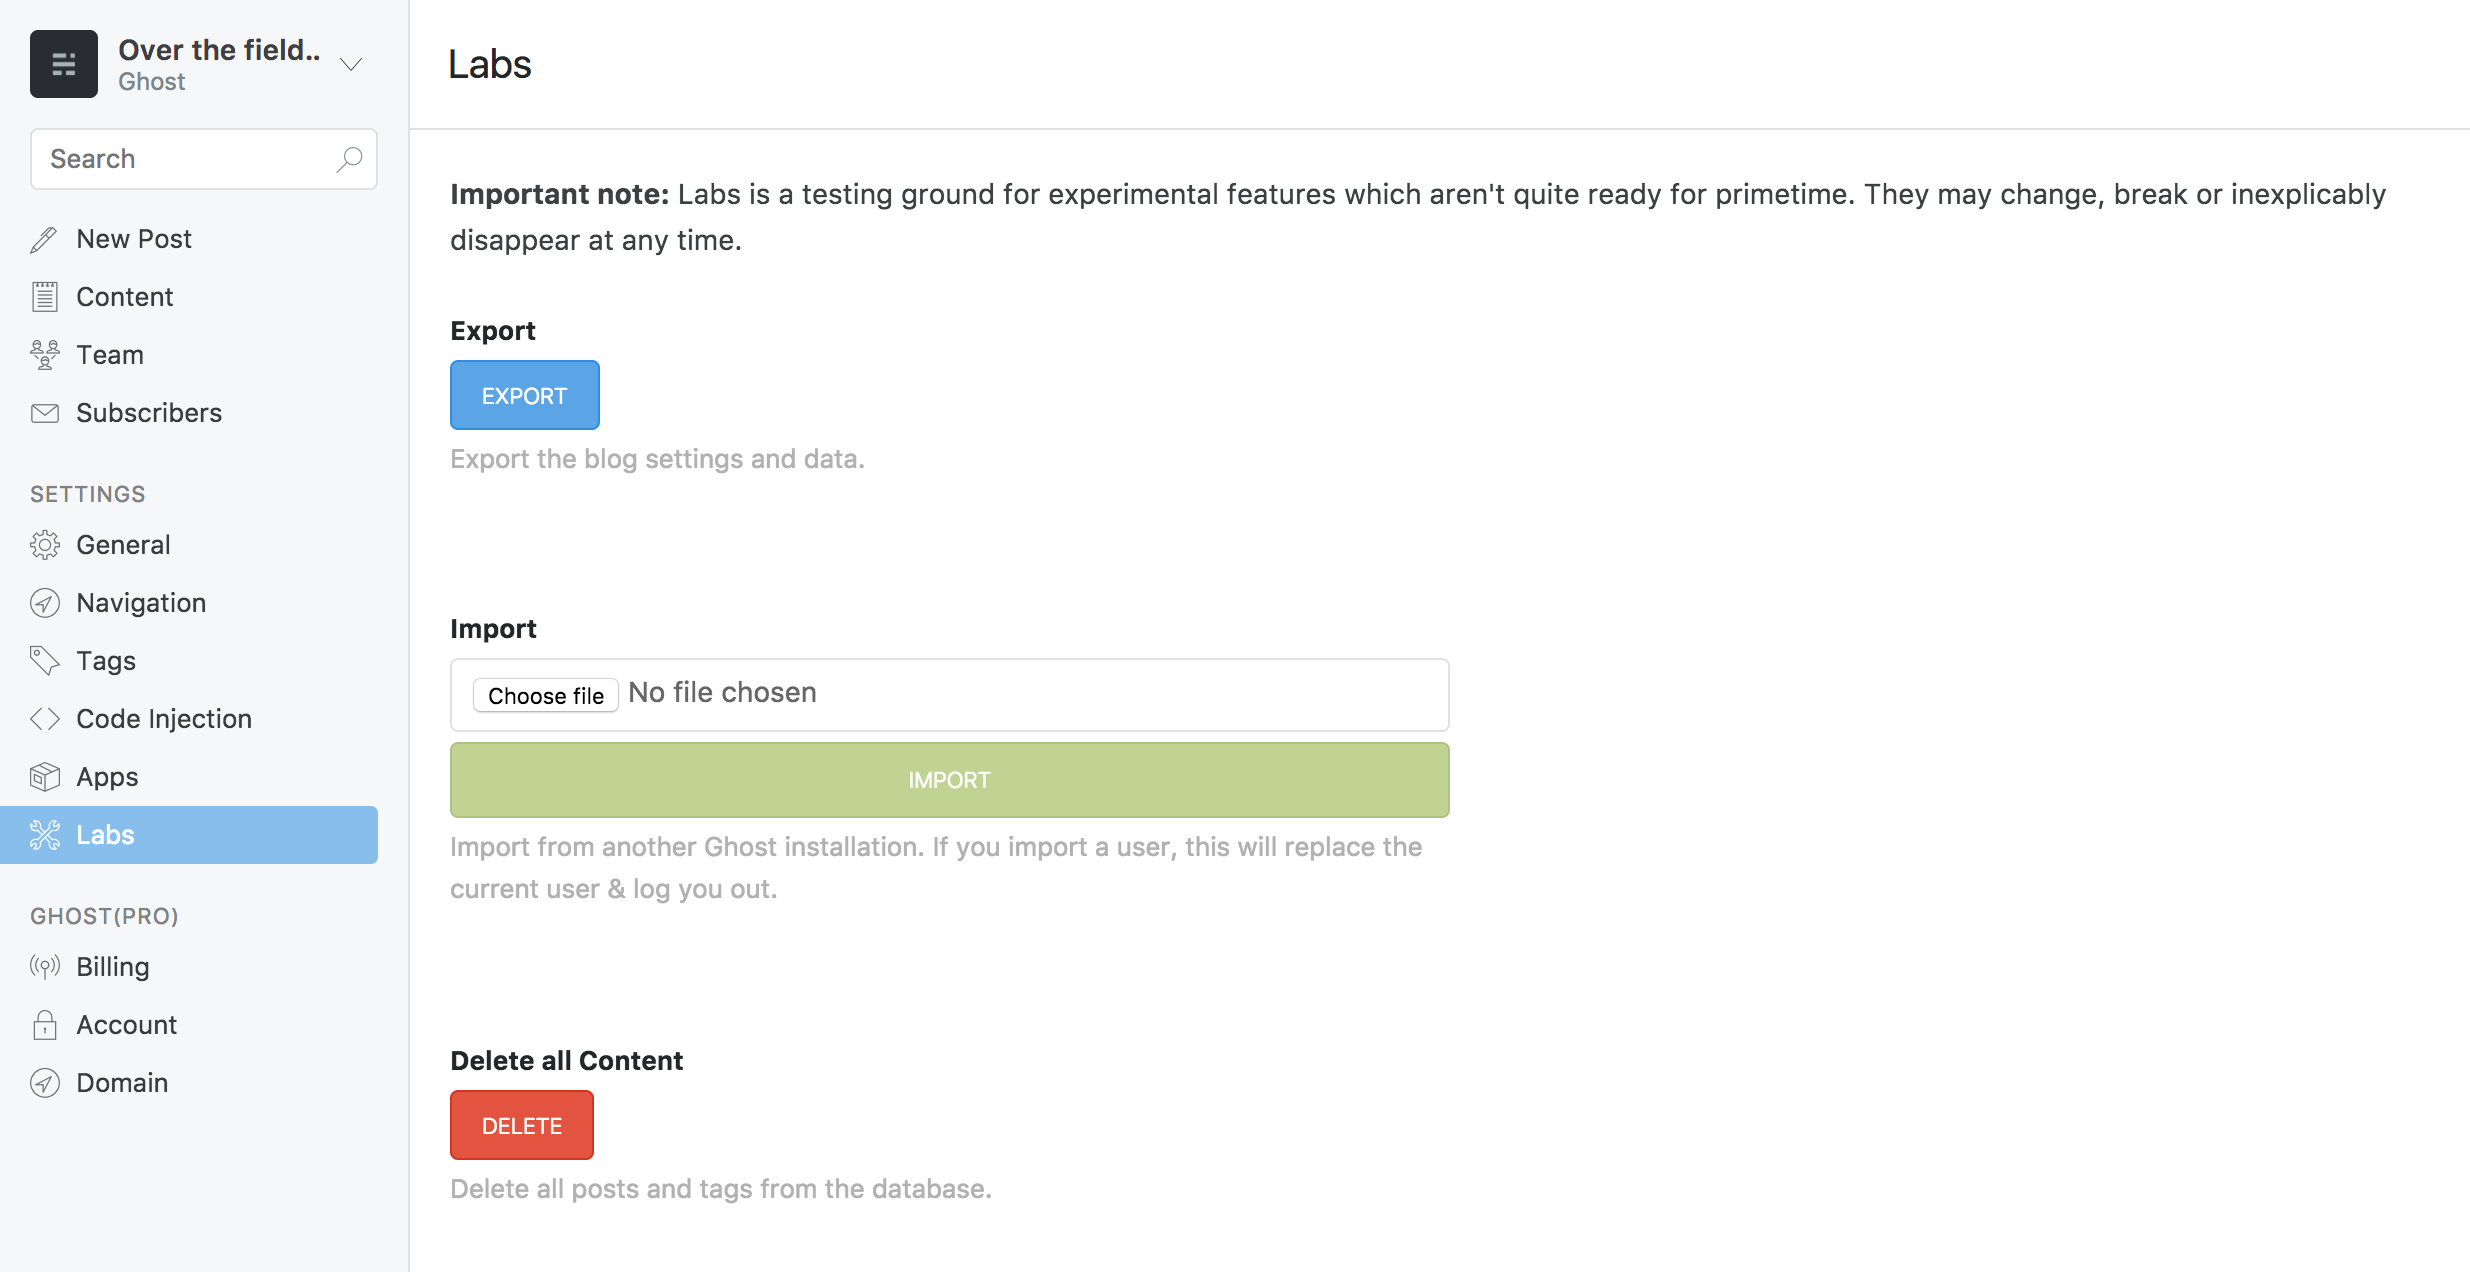 官網上的圖示
下載了的只有內文及設定,你曾上載的圖片及主題還是要保存起來的
到 content/images 下載你的圖片
然後可以登入出到新的Ghost
在Labs中Import Content就可以馬上見到之前的內容重新出現
圖片也是重新上載到 content/images 中即可。
最後比較麻煩是我本身在用的Theme不支援1.0
在Design中上載Theme時發現
Ghost 1.0中{{image}}改成了{{feature_image}} {{profile_image}} {{cover_image}} 等等...
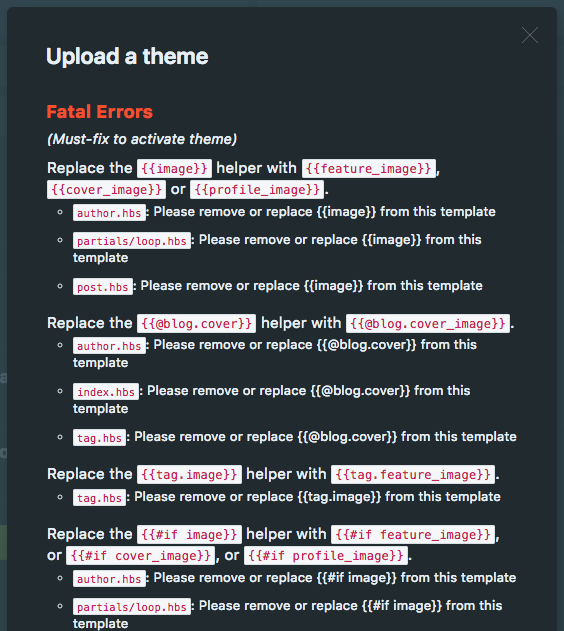
雖然依照Errors Msg也可以自行改成1.0適用的版本
但因此令我產生了自製一個Ghost Theme的想法
畢竟Ghost的Free Theme不多,希望為社群提供多一個選擇
改天再研究一下
其他新功能
今次Backend也有不少改動,Post改成Story,Content改成Stories,整個Editor變成整有Medium風格,是向Medium致敬嗎?
Night shift UI不錯的說,跟我用Atom的顏色配置十分相似。
最少見到是繼續進步,雖然新安裝花了我不少時間,但我除了在Medium上的寫作外
還是會繼續使用Ghost作為主要的Blog Platform。
更新
1.0後的版本更新異常地快(現在已經1.8.0),如果更新成1.X版本時是用Ghost-CLI beta的話,更新時會出現類似的訊息
$ Ghost was installed with Ghost-CLI v1.0.0-rc.2, which is a pre-release version.
$ Your Ghost install is using out-of-date configuration & requires manual changes.
$ Please visit https://docs.ghost.org/v1/docs/how-to-upgrade-ghost#section-upgrading-ghost-cli for instructions on how to upgrade your instance.
雖然更新還是可以正常運作但是每次也出現很煩人
其實只要在.ghost-cli內的cli-version版本改成現在使用的版本
在下次更新就不會見到這煩人的訊息了。