【SD實驗室】怎麼生成特式 QR Code ?
近日在 Reddit 一名用家放出了震撼 AI Generation 界的 QR Code 作品,他將 QR Code 完美隱藏在 Stable Diffusion 生成的圖片當中,利用 QR Code 的容錯度生成了很多不同風格的 QR Code 引來一時熱話。

近日在 Reddit 一名用家放出了震撼 AI Generation 界的 QR Code 作品,他將 QR Code 完美隱藏在 Stable Diffusion 生成的圖片當中,利用 QR Code 的容錯度生成了很多不同風格的 QR Code 引來一時熱話。
事前準備
- 當然是 QR Code,現在有很多裝飾了的 QR Code,但我們不需要這些,生成一個最簡單的就好了,記得 save as jpg,我用 這個網站 就生成了
blog.256pages.com的 QR code。 - 就是安裝 ControlNet 1.1
- Checkpoint 我就用上
Rev Animated v1.2.2
img2img 設定
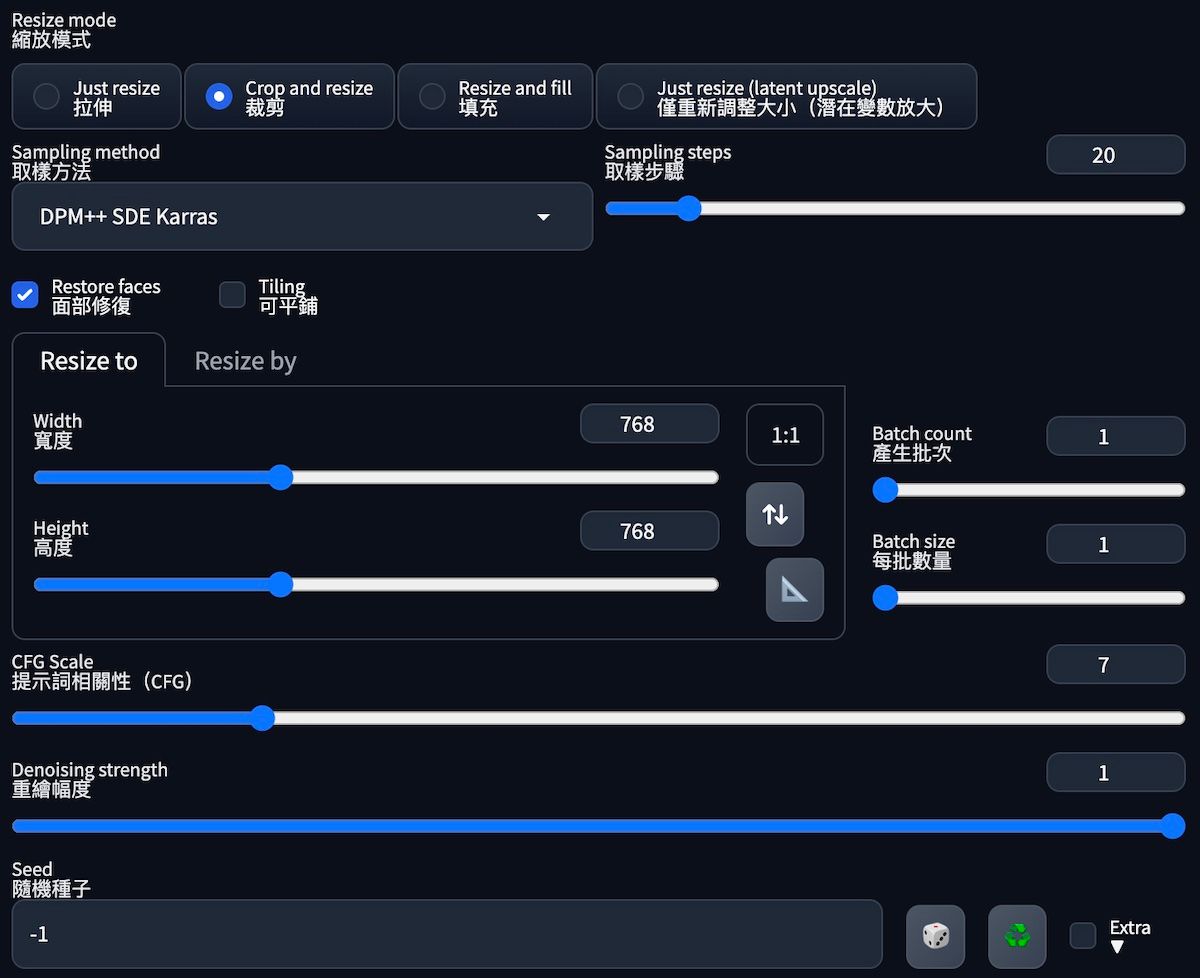
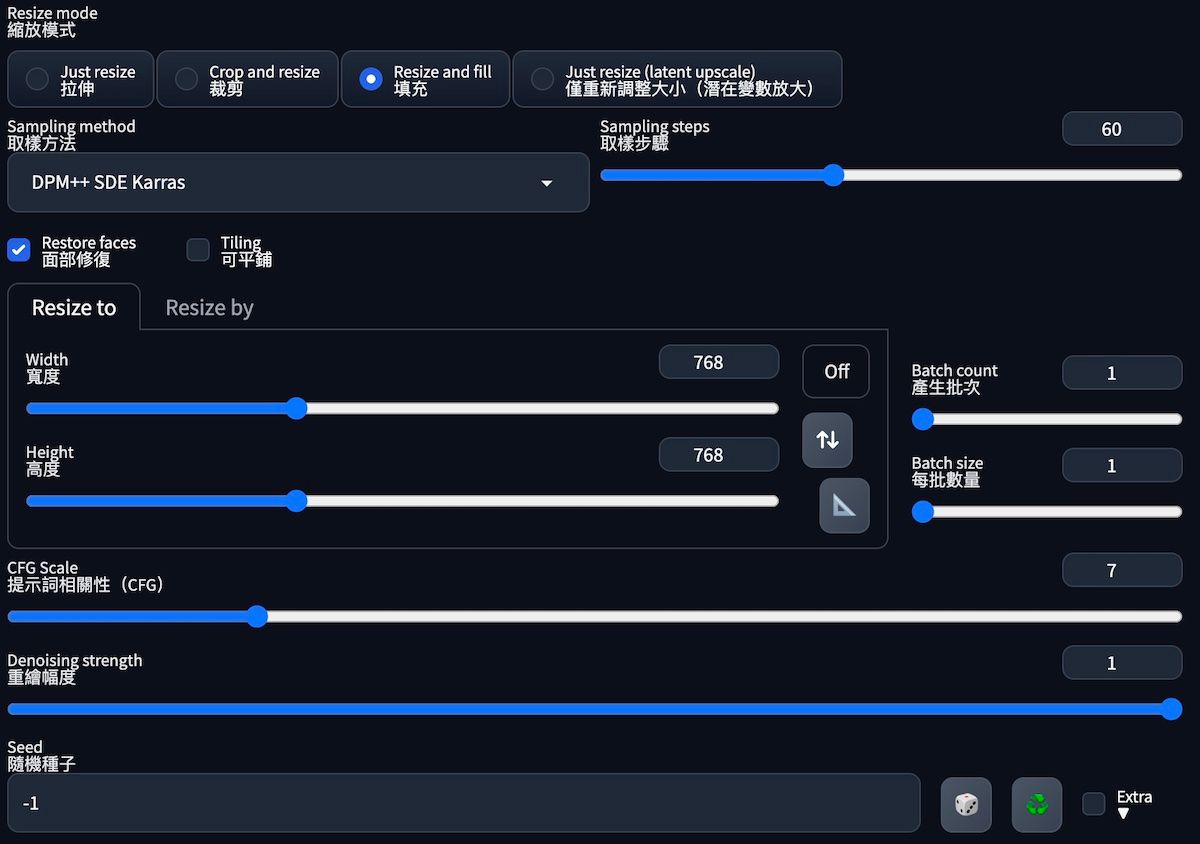
圖就用 QR Code 圖,重點是重繪度設定為 1 ,長闊 768 解像度高一點感覺成功率會比較高。
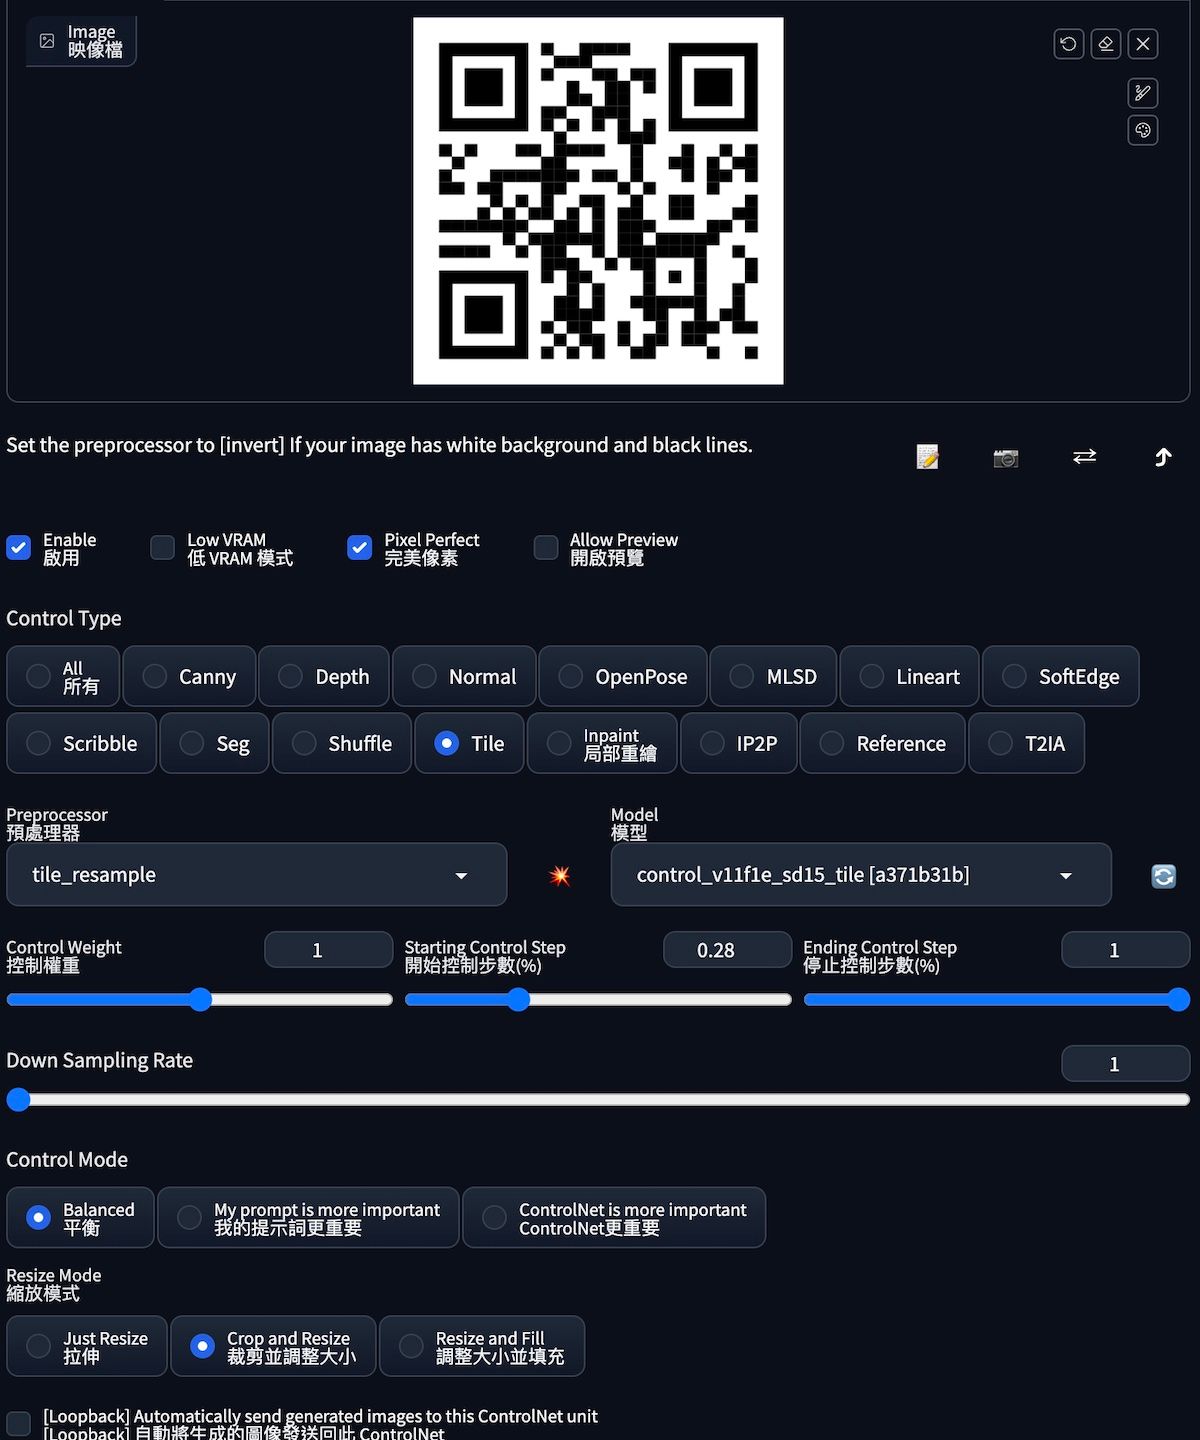
ControlNet 設定
今次為了確實地重現 QR Code 使用的是 ControlNet 的 tile_resample ,重要設定是 Starting Control Step,必須設定在 2.2 - 2.8 之間,數字太少的話 QR Code 會太明顯,只像 QR Code 加了背景圖的樣子,但數字太大的話 QR Code 就會 scan 不到,在調節效果時可以增減這個數值進行測試。
如未有 tile 的 Model 請到以下連結下載 control_v11f1e_sd15_tile.pth 。
Prompts 設定
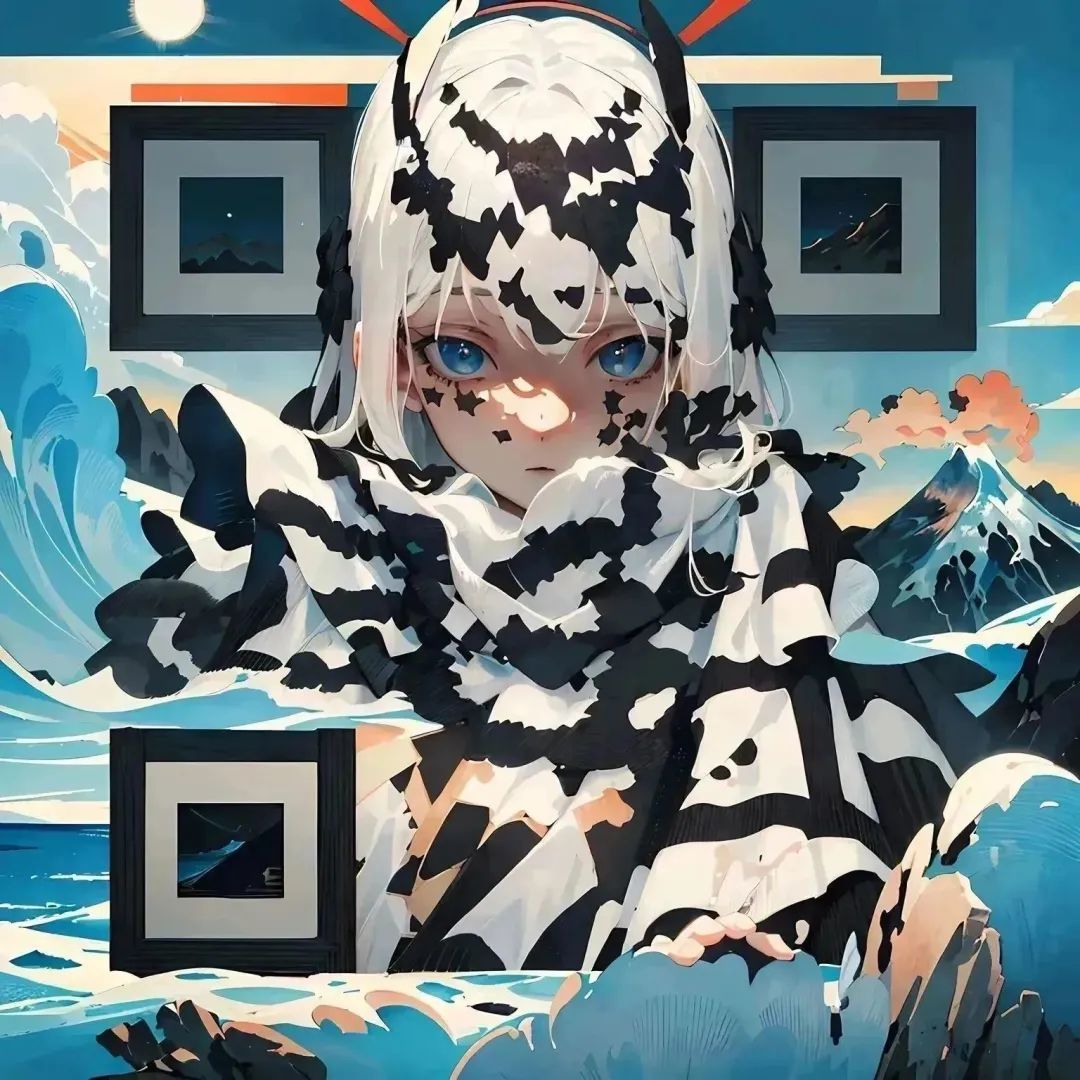
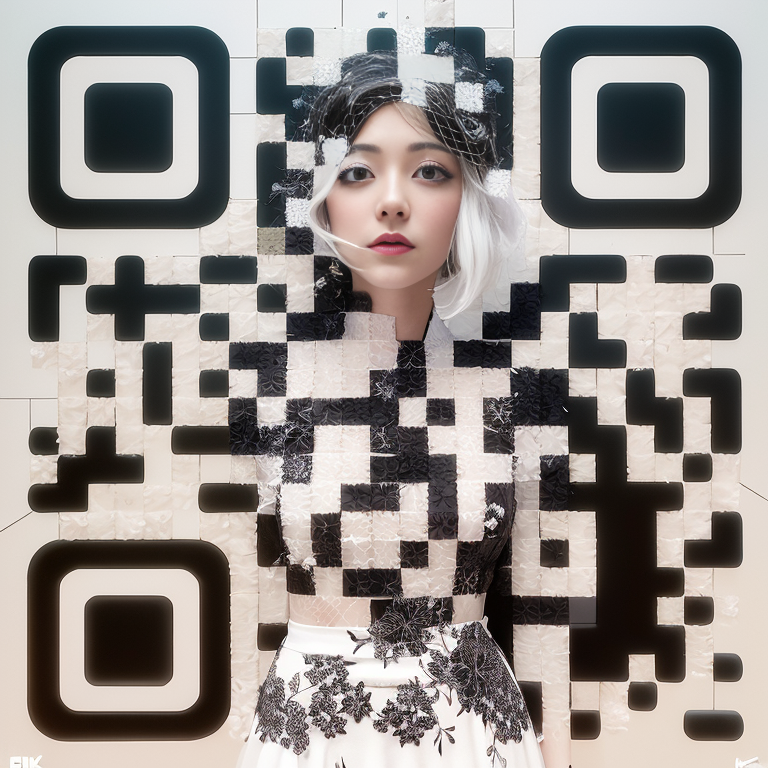
今次的 prompts 相對沒這麼重要,但也有需要注意的地方。第一個我使用了 nijiMecha 這個 LoRA 機械風格。
機械風 QR Code
Prompts: ((masterpiece)),(best quality),(ultra-detailed), 1male, solo, mask, realistic, mecha, no humans, robot, science fiction, dynamic pose,<lora:Niji:0.5>
Negative prompts: paintings, sketches, (worst quality:2), (low quality:2), (normal quality:2), lowres, ((monochrome)), ((grayscale)), watermark, username, signature, bad anatomy, bad hands, text, error, extra digit, fewer digits, cropped, jpeg artifacts, single color, (((duplicate))), (((mutation))), (((deformed))), ((ugly)), blurry


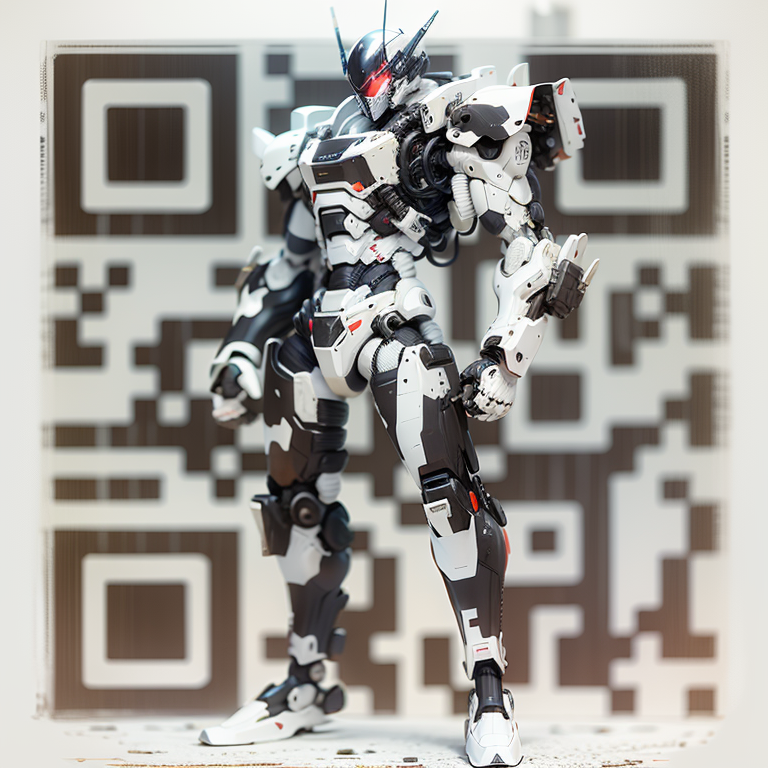
如果出來的機械人會站在 QR code 當中,身上會有些零件或排氣口似的東西來取代黑色的 code 點點,看起來有融在一起的感覺,用手機掃瞄時有時要拉遠一些才能讀取,但結果還是成功的。
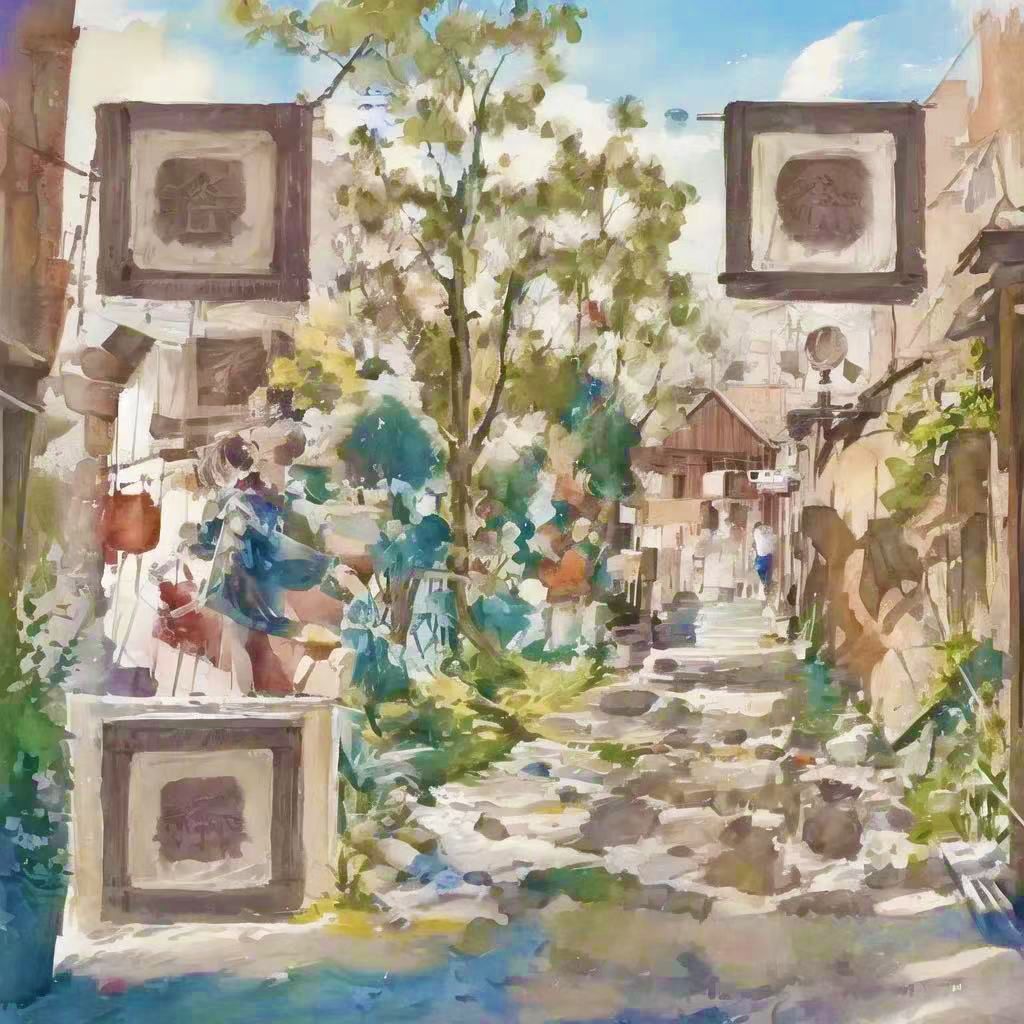
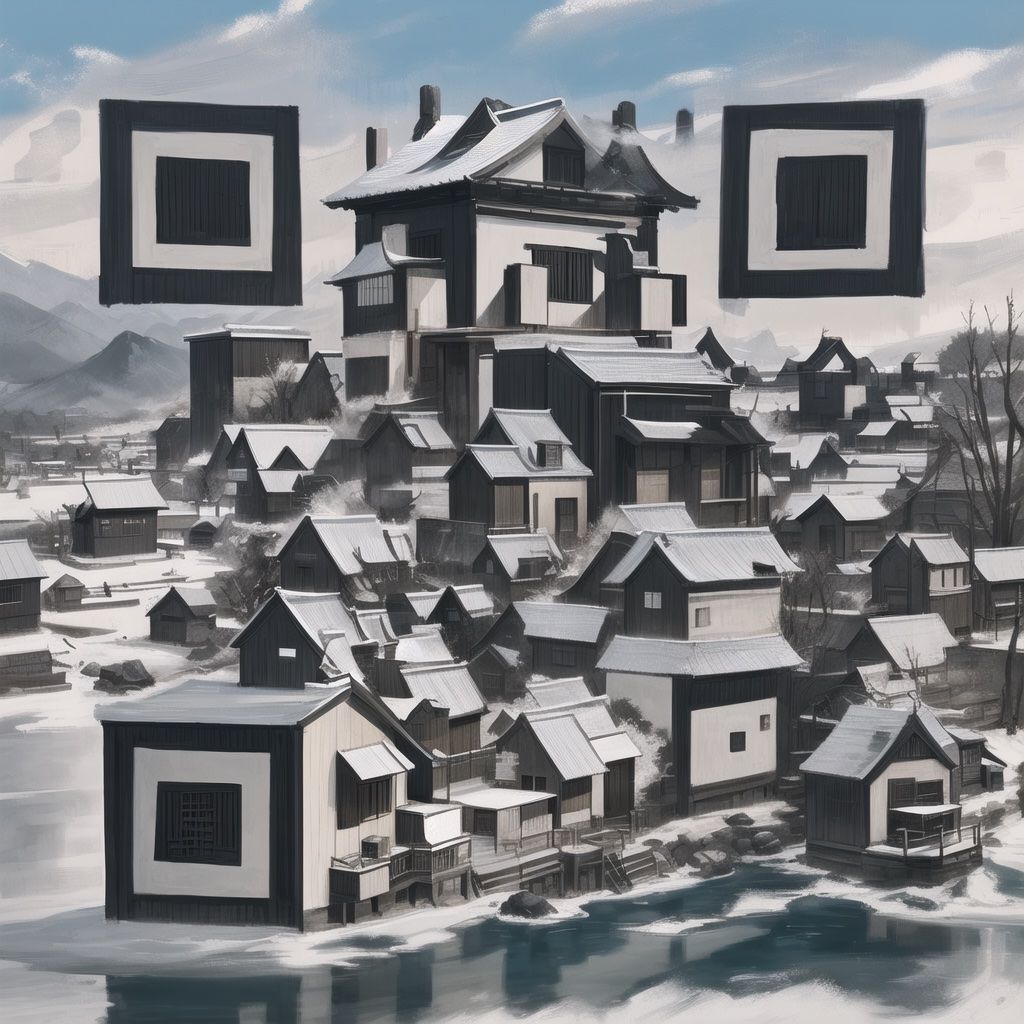
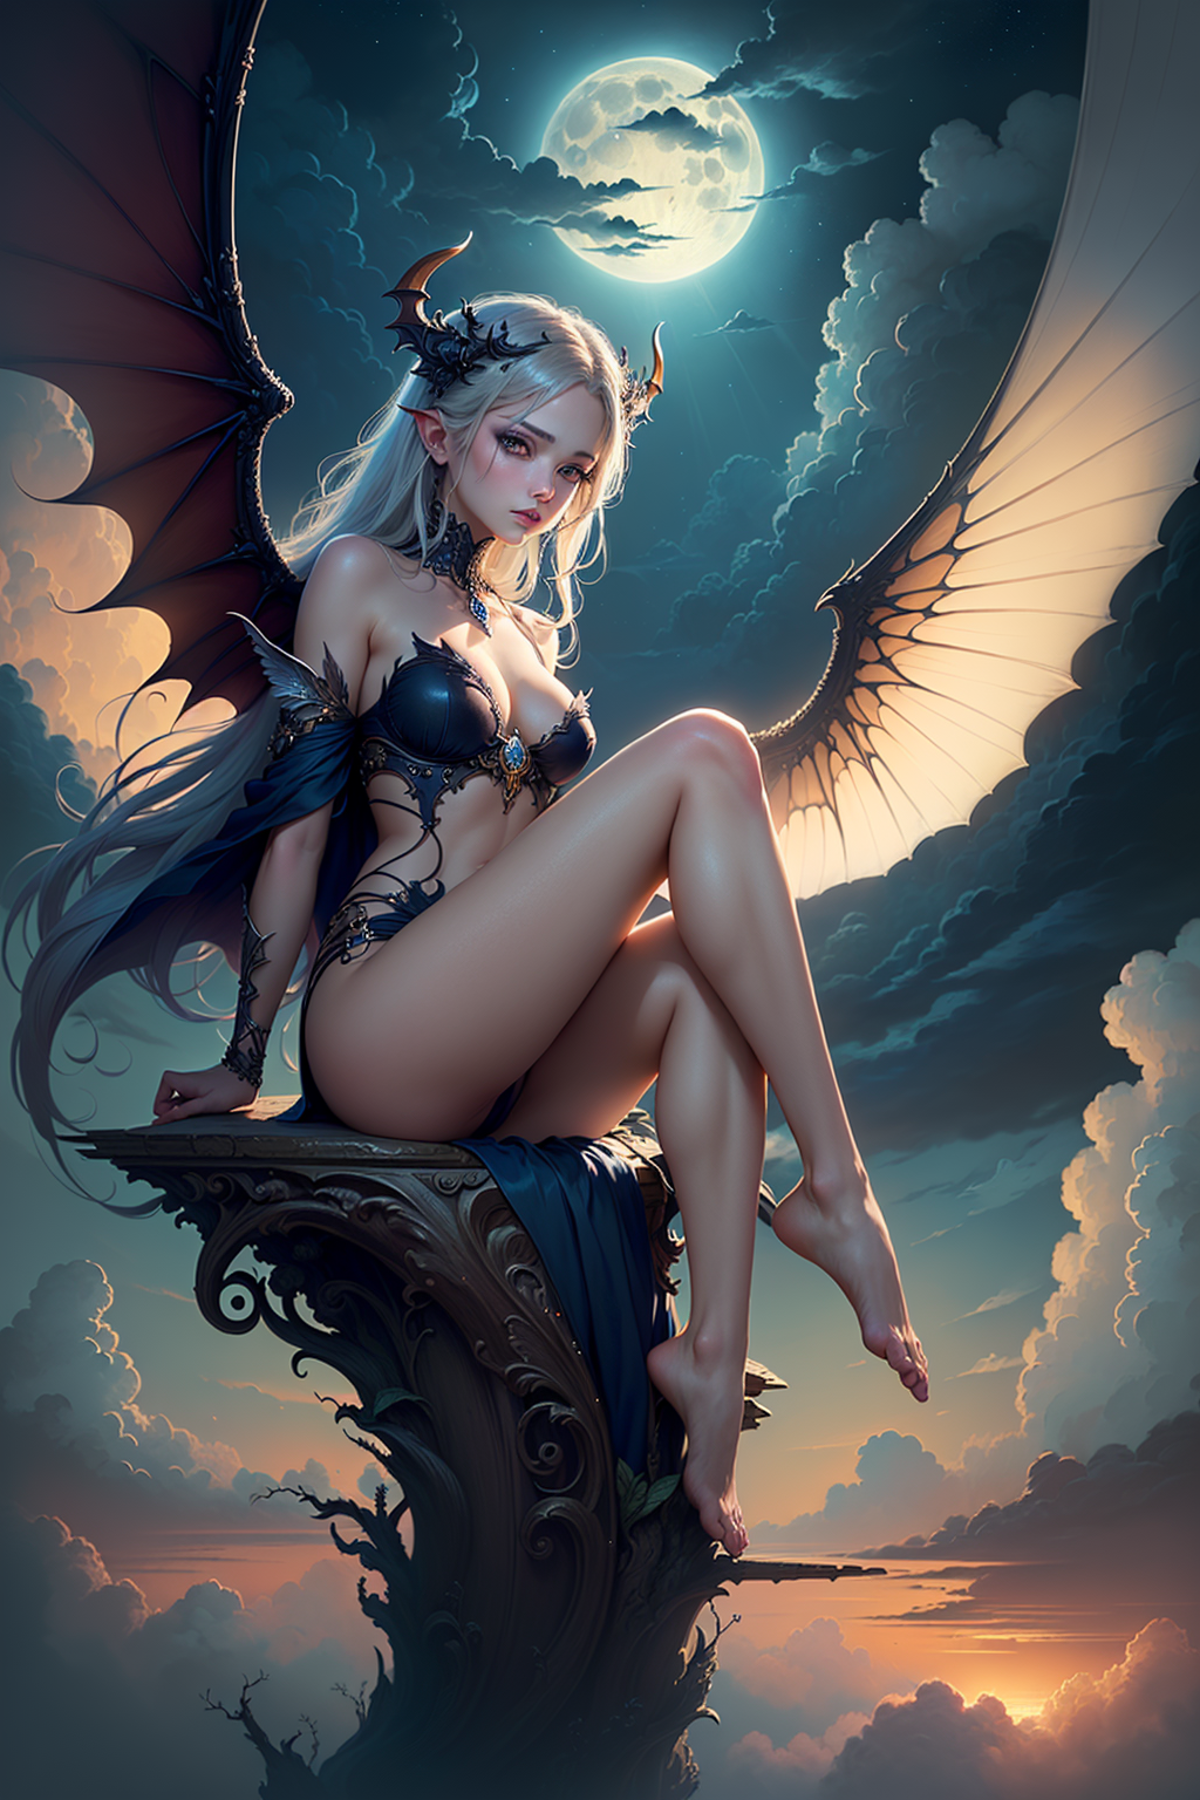
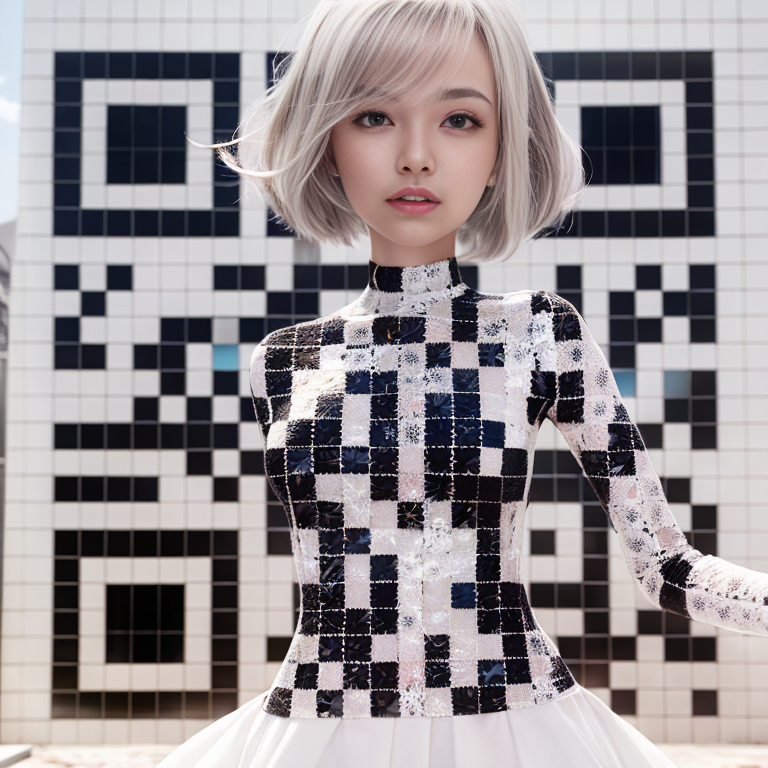
建築風 QR Code
我使用了一個立體建築的 LoRA。

Prompts: ((masterpiece)),(best quality),(ultra-detailed), real,(realistic), super detailed, (full detail),(4k),scenery, tree, outdoors, building, sky, road, window, reflection, street, day, <lora:HouseBlurprint_v01:0.7>
Negative prompts: paintings, sketches, (worst quality:2), (low quality:2), (normal quality:2), lowres, ((monochrome)), ((grayscale)), watermark, username, signature, text, error, extra digit, fewer digits, cropped, jpeg artifacts, single color, (((duplicate))), (((mutation))), (((deformed))), ((ugly)), blurry,

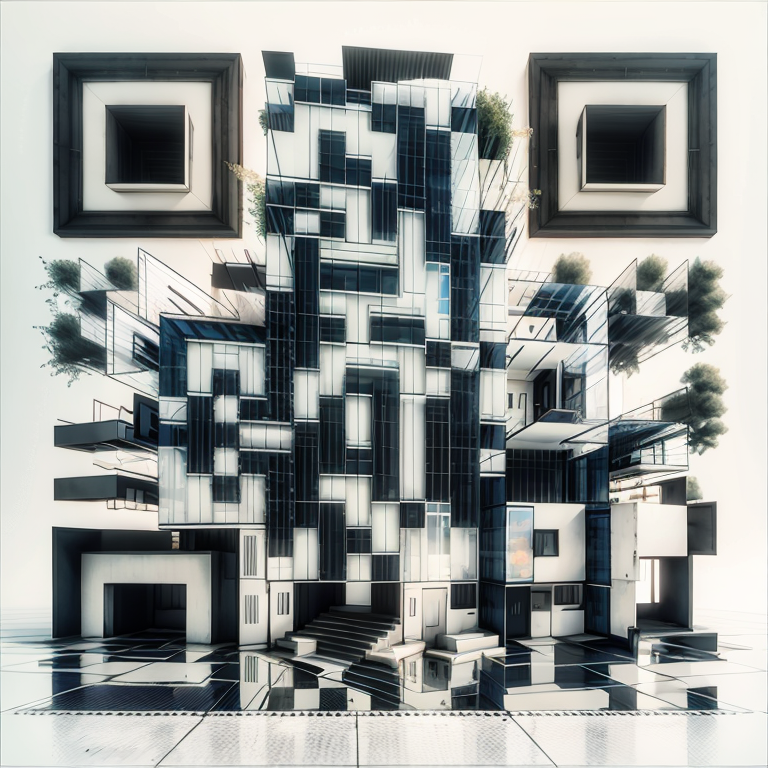
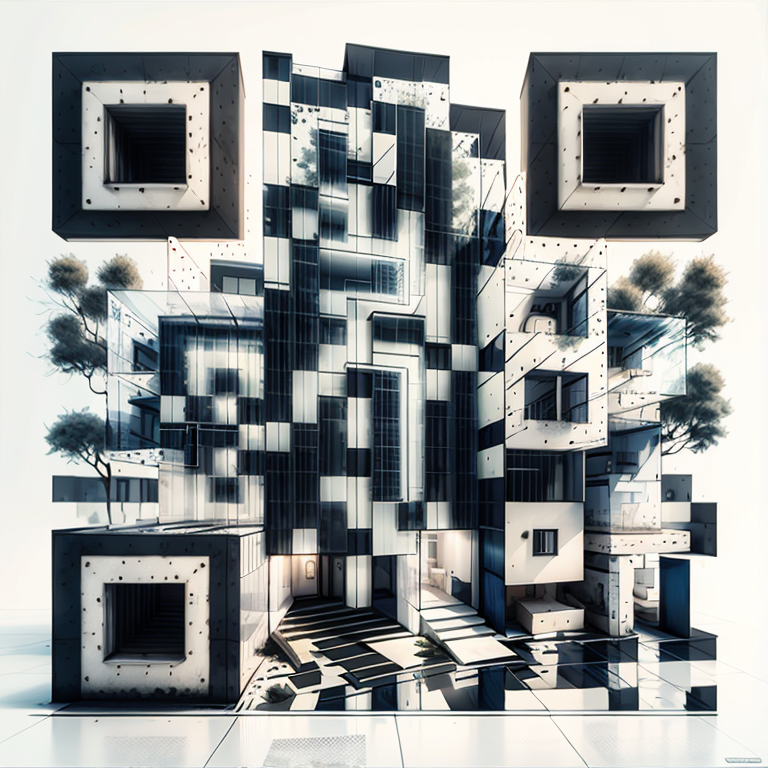
看起來有立體風建築風格,但玻璃部份如果太淺色的話就會讀不到 QR Code,所以成功率不高。必要時調低一點 Starting Control Step 到 2 左右增加成功率。
追加內容 - 另一種做法
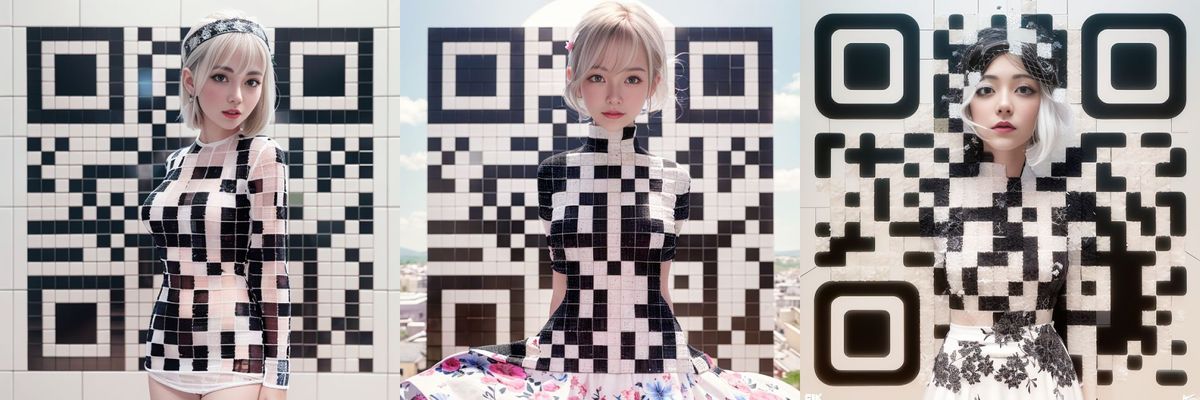
本物實驗總算完成,但用以上方法生成的 QR Code 可以讀取,但是整體上還不如預期,生成結果總是黑白色的,加上實驗後在網上見到一些新的做法,所以馬上試試看。
除了本身必須的 ControlNet tile 和 QR Code 以外,也需要用 txt2img 生成一張樣本圖給 im2img 用, Checkout 做用最常見的 chilloutMix 。
沒有特定的 prompts 及 negative prompts,不過 full body 的全身像會比較易成功。生成圖就掉到 img2img 的主圖中, img2img 使用以上相同的 prompts 即可。
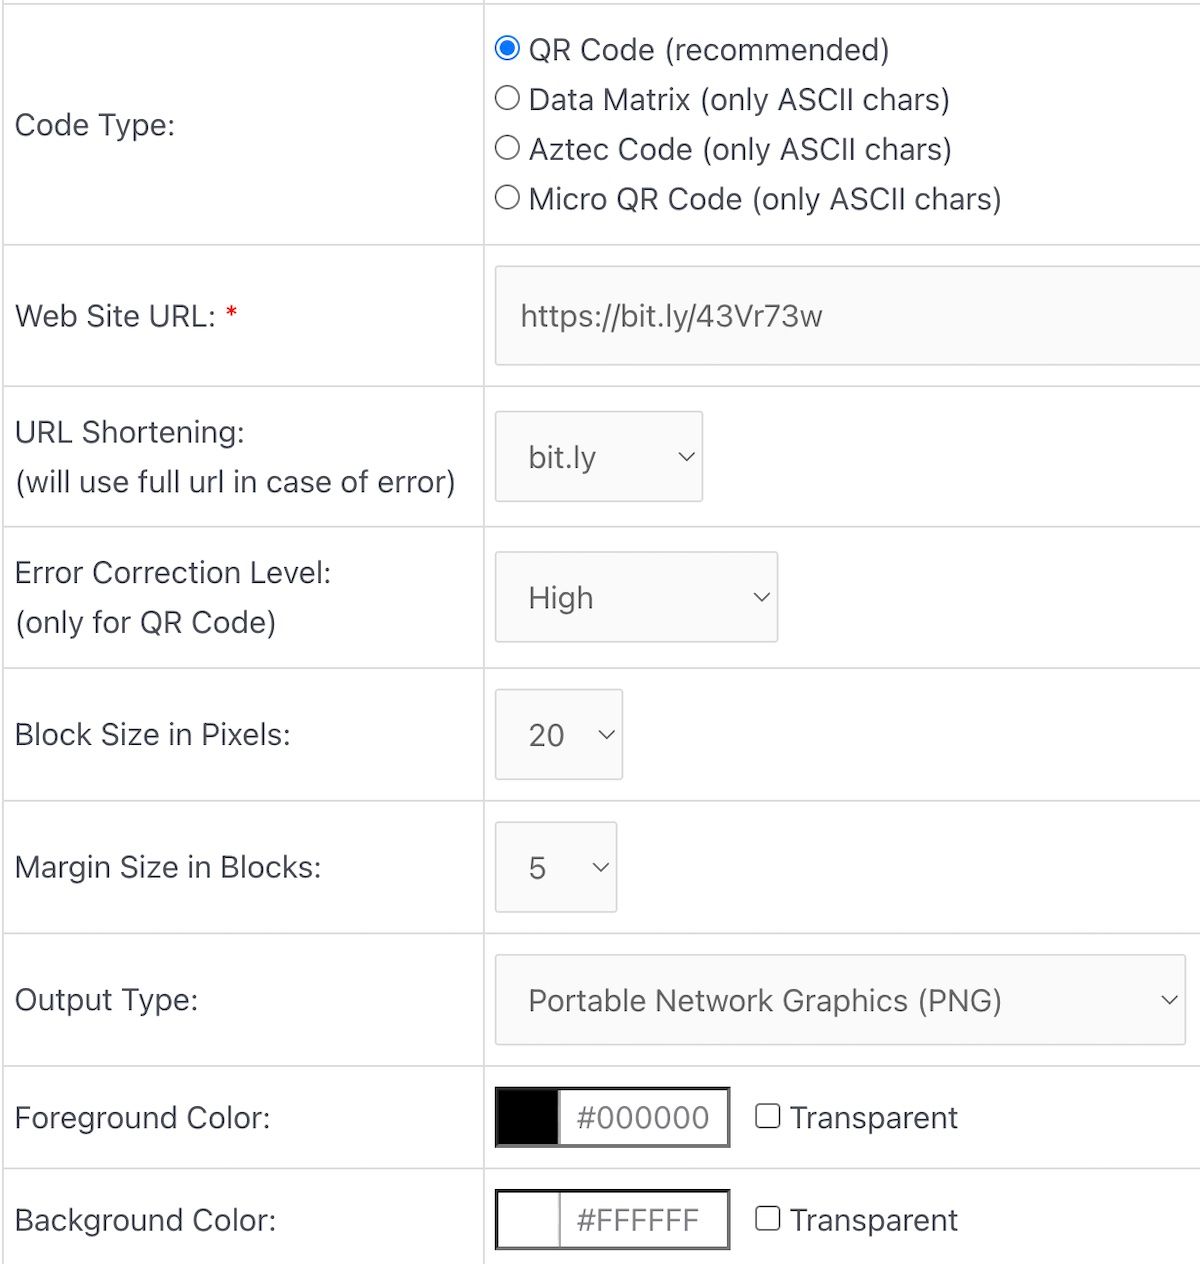
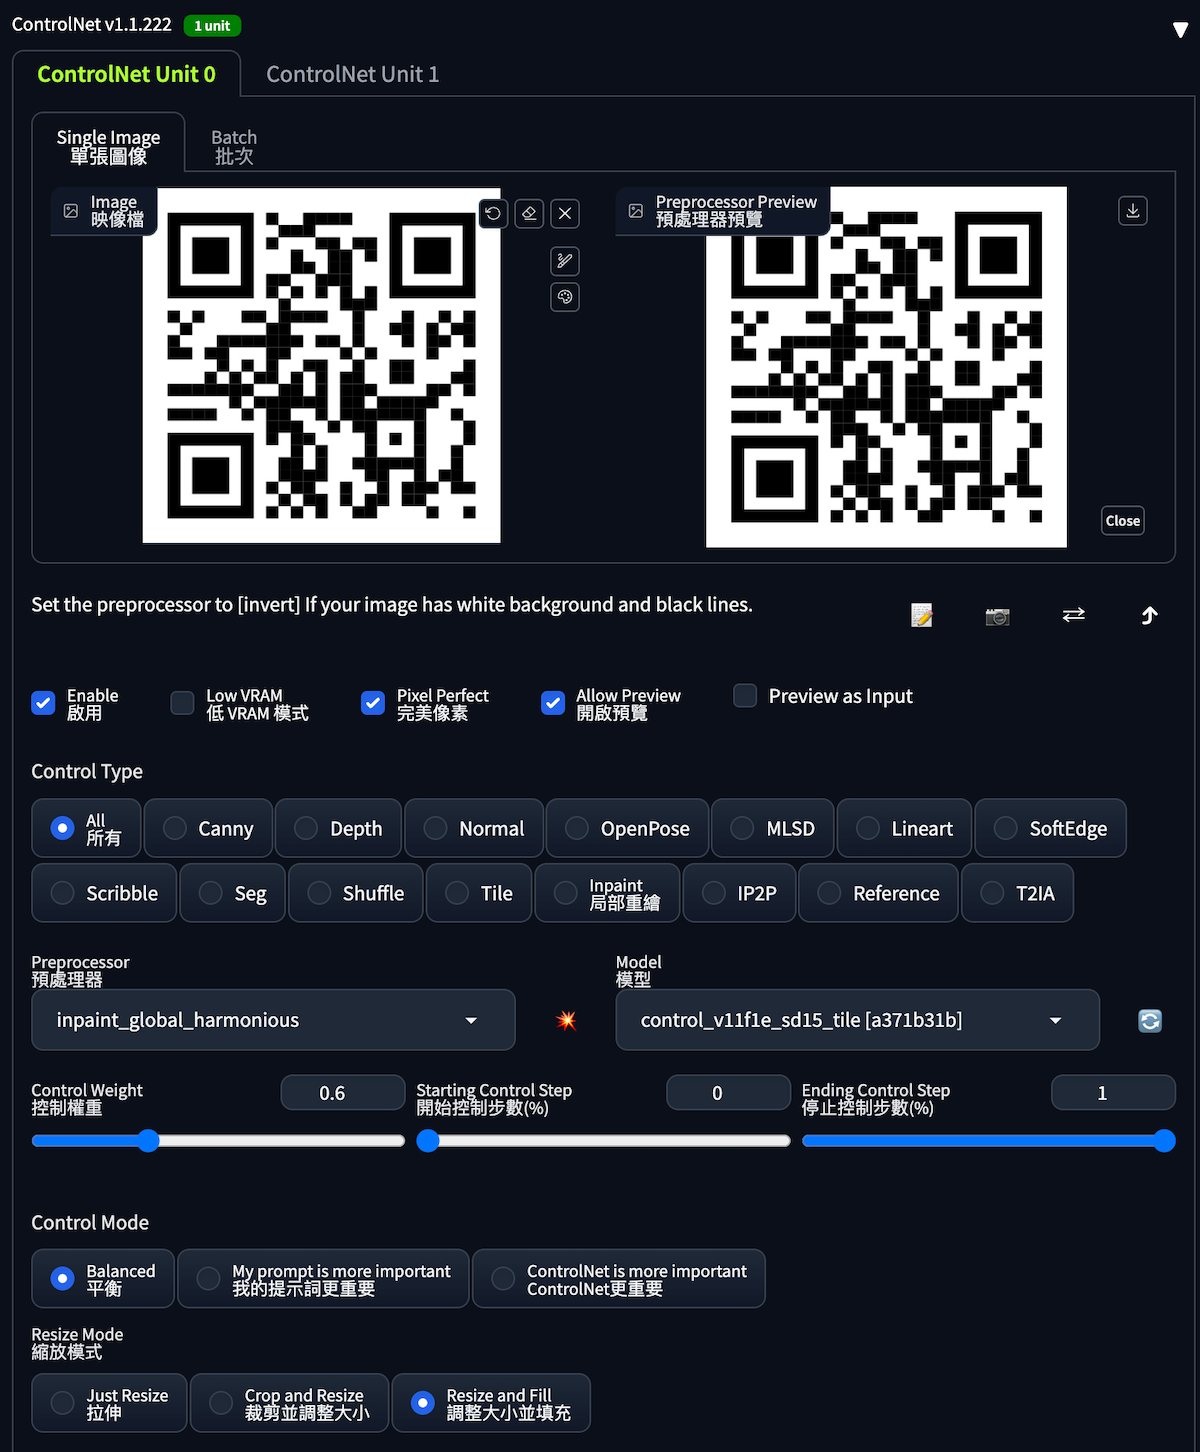
QR Code
使用可設定 QR Code 容錯度的生成器,把 Error Correction Level 設定為 High ,以及使用短網址以降低因網址太長而太複雜的 QR Code,Margin Size in Block 設定為 5 以上 QR Code 周邊的空間會多一點。
 April 4, 2023 at 16:51
Img2img 設定
重點是 Sampling steps 要高,我設定為 60 ,Size 設定高一點成功率會比較高,重繪幅度 0.8 - 1 之間。
ControlNet 設定
ControlNet 圖依然使用 QR Code,重點是 Preprocessor 使用 inpaint_global_harmonious , Model 一樣使用 control_v11file_sd15_tile ,ControlNet 權重 0.5 - 0.6 之間。
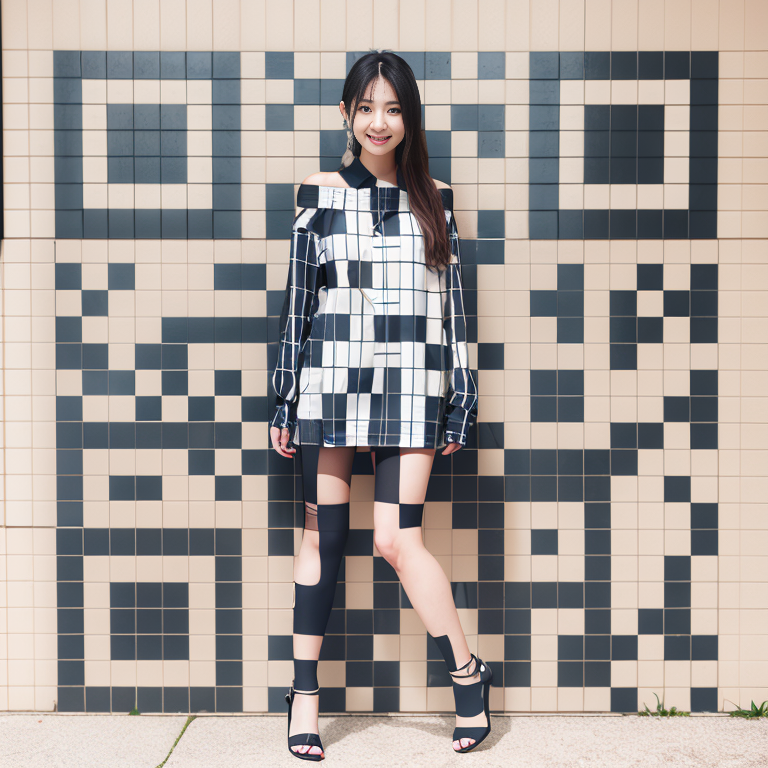
這樣就可以生成 QR Code 好像印在衣服上的圖案一樣的結果,不過因為有部份 QR Code 會被人物覆蓋,所以還是要逐張用手機測試 QR Code 成功與否。

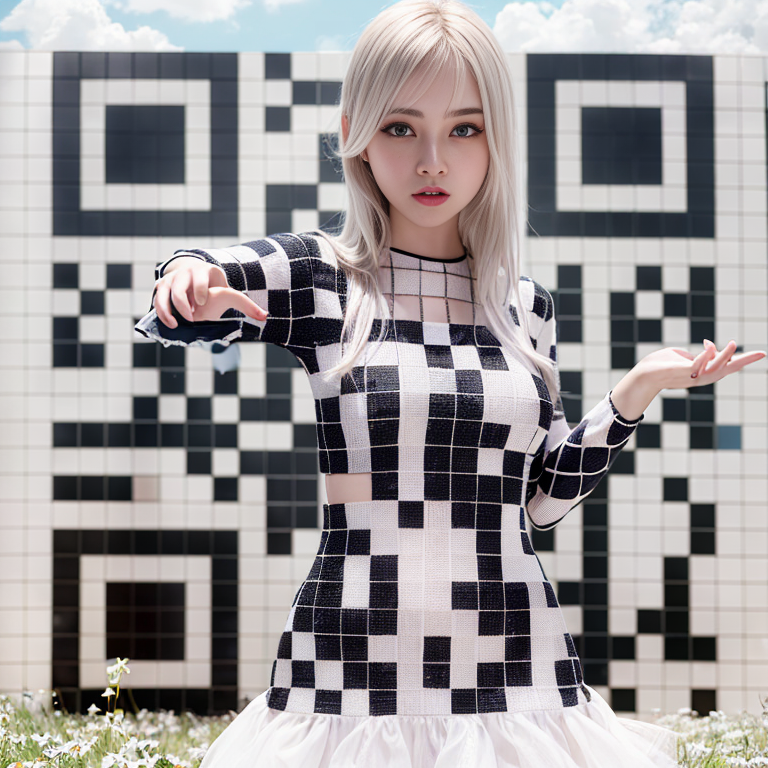
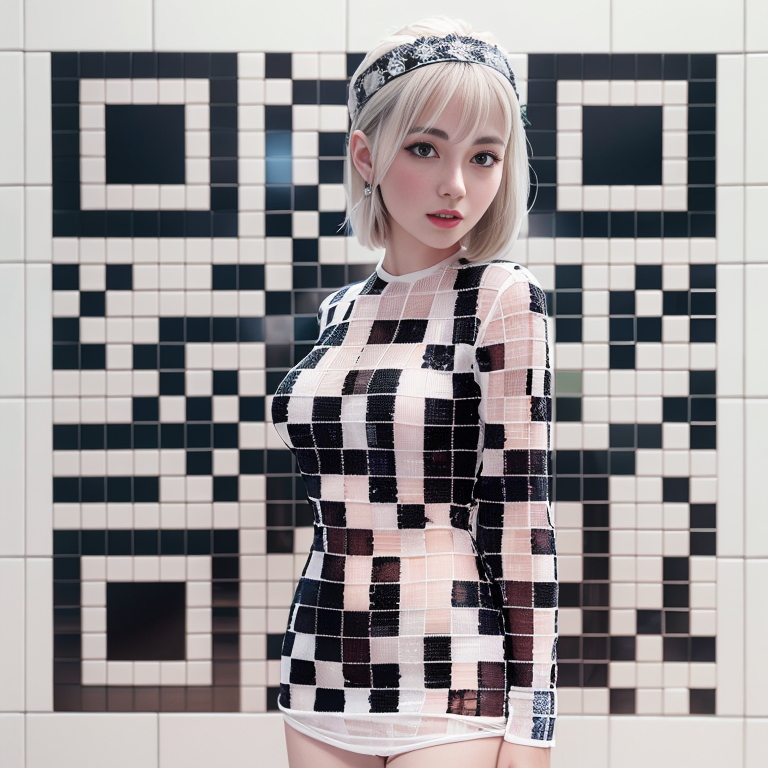
以上 QR Code 都己經用 Android QR Code Scanner App 測試成功,但未經 iOS Device 測試,不過理論上應該都可行吧!
總結
經此次實驗室除了發掘了 QR Code 的可能性外,還有更多就是想生成一種東西,不一定只有單一種方法,大家可以嘗試用更多不同的方法,或者有更好的成果也說不定。